Time Delay Sections in Elementor (Have Sections Display after a Certain Time)
Hi Folks.
I will show you how to Reveal section in elementor page after certain time.
Suppose you want to hide certain elements in your wordpress landing page after a certain time to increase conversions.
You can do so using Elementor Plugin.
Question:
I have a landing page with video sales letter and I want to show the section below the video that contains the offer 5 minutes after visitor opens the page.
I tried revealing section by implementing fade in animation with animation delay on advanced settings tab, but it leaves huge empty space of the section visible and just hides all the elements inside.
I tried doing this with implementing Dynamic Content plugin, but they only have timers with predefined dates, days in the week or certain hours in the day.
As far as I searched for, I couldn’t find plugin/solution that will reveal section after certain time. I am thankful for any suggestion.
Solution:
To achieve the effect of revealing a section after a certain time (in this case, 5 minutes) without leaving an empty space on the page, you can use JavaScript to handle the timing and CSS to manage the visibility and animation. Here’s a step-by-step solution you can implement:
- Initial Setup: Start by hiding the section you want to reveal using CSS.
- JavaScript Timer: Use JavaScript to set a timer that will change the CSS class of the hidden section after 5 minutes.
- CSS Animation: Define a CSS class that includes the fade-in animation.
Let’s do this.
Step-by-Step Implementation with Code Snippets Plugin
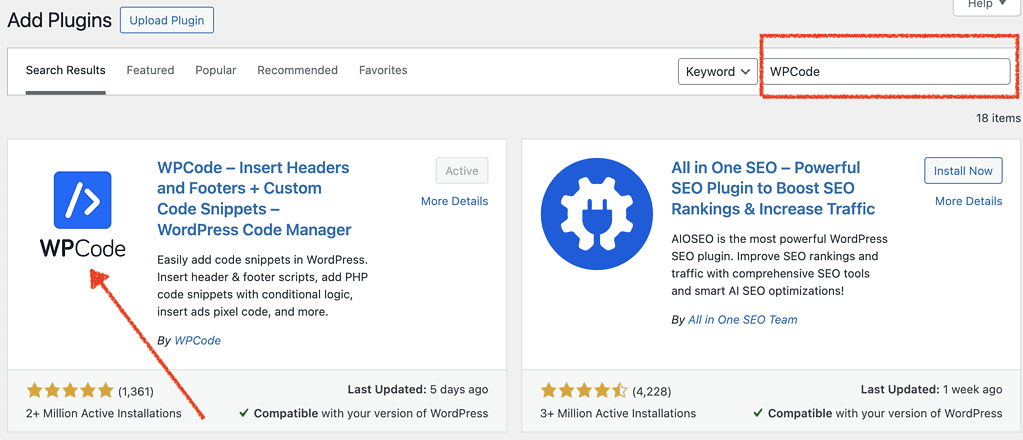
- Install and Activate the WP Code Code Snippets Plugin:
- Go to your WordPress dashboard.
- Navigate to Plugins > Add New.
- Search for “WP Code”
- Install and activate the Code Snippets plugin by WP Code.
- Add a New Snippet:
- After activating, go to Snippets > Add New.
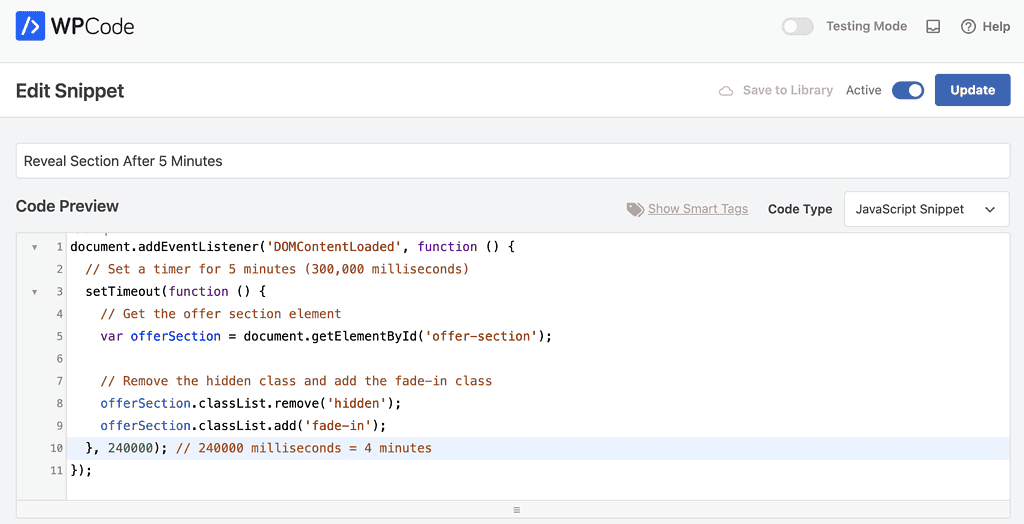
- Give your snippet a title, like “Reveal Section After 5 Minutes”.
Add JavaScript Code:
- In the Code field, switch to the JavaScript tab.
- Paste the following JavaScript code:
document.addEventListener('DOMContentLoaded', function () {
  // Set a timer for 5 minutes (300,000 milliseconds)
  setTimeout(function () {
    // Get the offer section element
    var offerSection = document.getElementById('offer-section');

    // Remove the hidden class and add the fade-in class
    offerSection.classList.remove('hidden');
    offerSection.classList.add('fade-in');
  }, 300000); // 300000 milliseconds = 5 minutes
});
In the above code you can change the 2nd last line where it is written 300000 to a time of your choice in milliseconds.
For Example, To set a timer of 4 minutes, I will write 240000 (4 x 60 x 1000)
just use google to convert seconds into milliseconds. and replace the number with your time.
- In the Code Snippets plugin, there’s no need to wrap the JavaScript code in
<script>tags.
Choose Where to Run the Snippet:
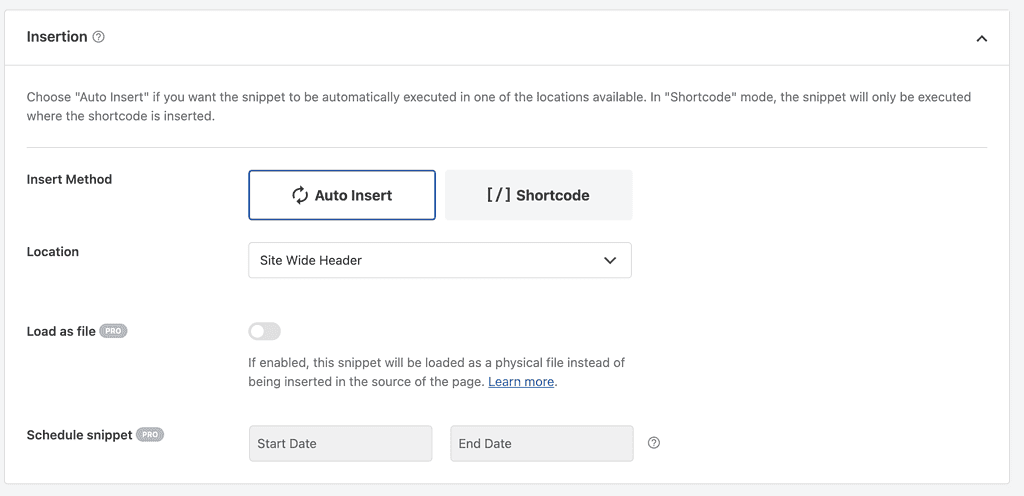
- In the Snippet Scope section, select Site Wide Header (Frontend). This ensures the JavaScript runs on the front end of your site.
Save and Activate the Snippet:
- Click Save Changes and Activate. Make Sure to turn it from Testing to Active.
Adding Custom CSS
Since you’re already using Elementor, you can add the custom CSS directly in Elementor’s Custom CSS section (for Elementor Pro users) or in your theme customizer if you’re not using Elementor Pro.
For Elementor Pro Users:
- Edit Your Page with Elementor.
- Add Custom CSS:
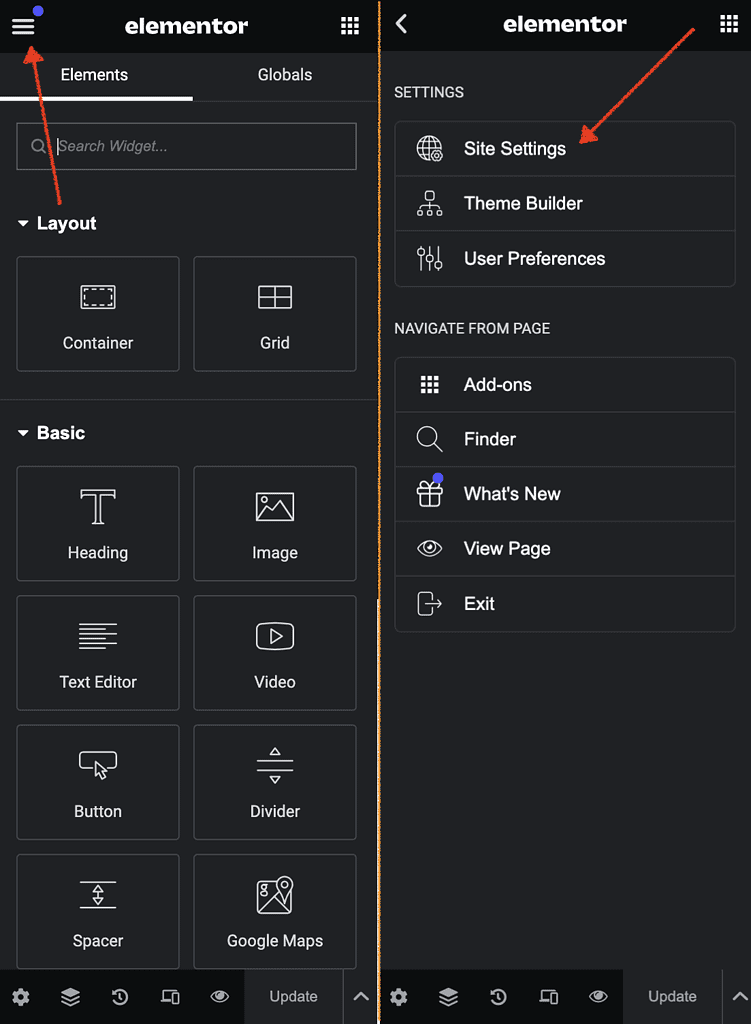
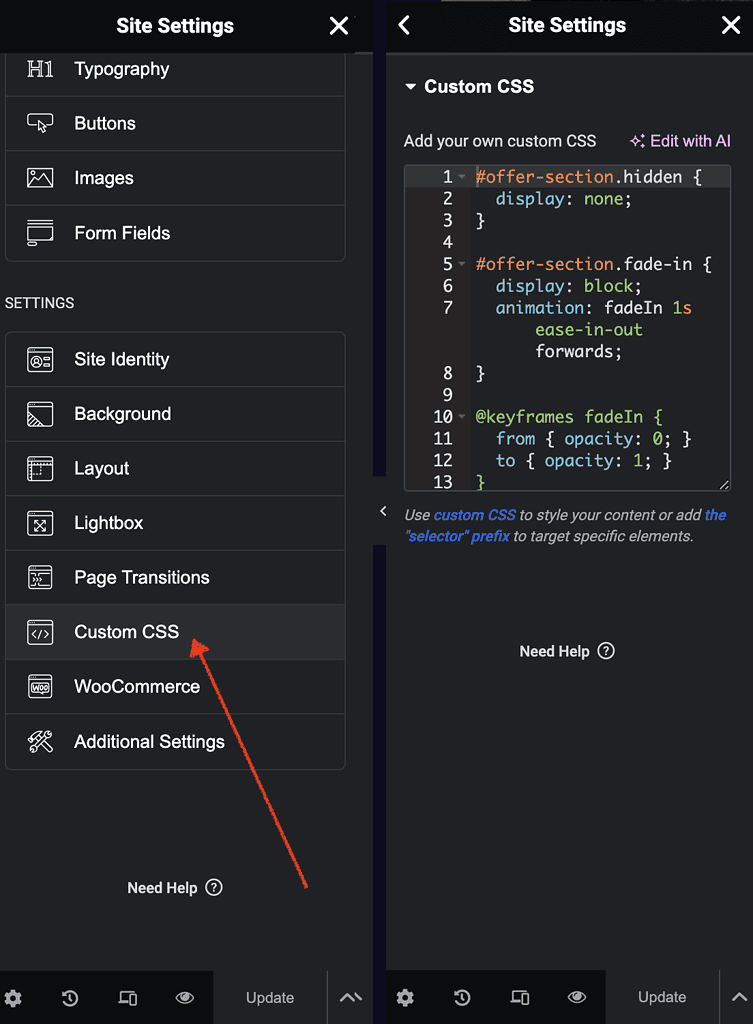
- Click on the hamburger menu (three horizontal lines) in the top-left corner.
- Go to Site Settings > Custom CSS.
- Add the following CSS code:
#offer-section.hidden {
  display: none;
}

#offer-section.fade-in {
  display: block;
  animation: fadeIn 1s ease-in-out forwards;
}

@keyframes fadeIn {
  from { opacity: 0; }
  to { opacity: 1; }
}
For Non-Elementor Pro Users:
- Go to Appearance > Customize.
- Navigate to Additional CSS.
- Add the CSS Code:
   #offer-section.hidden {
     display: none;
   }

   #offer-section.fade-in {
     display: block;
     animation: fadeIn 1s ease-in-out forwards;
   }

   @keyframes fadeIn {
     from { opacity: 0; }
     to { opacity: 1; }
   }
Setting the Initial State of the Section
Ensure the section you want to reveal has the hidden class initially.
- Edit Your Page with Elementor.
- Select the Section to Reveal.
- Set the CSS ID:
- Go to the Advanced tab.
- Set the CSS ID to
offer-section. - Add the class
hiddenin the CSS Classes field.
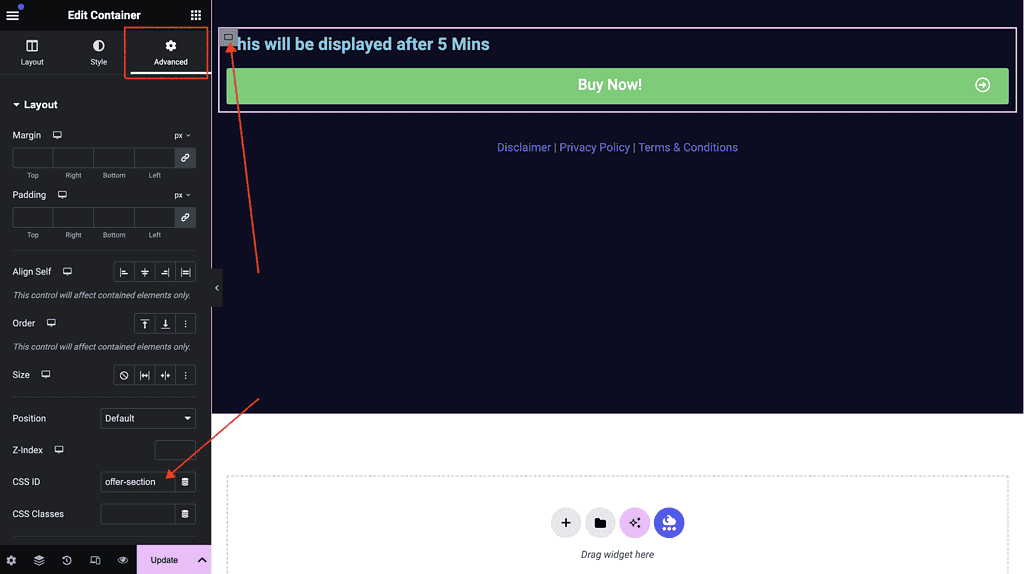
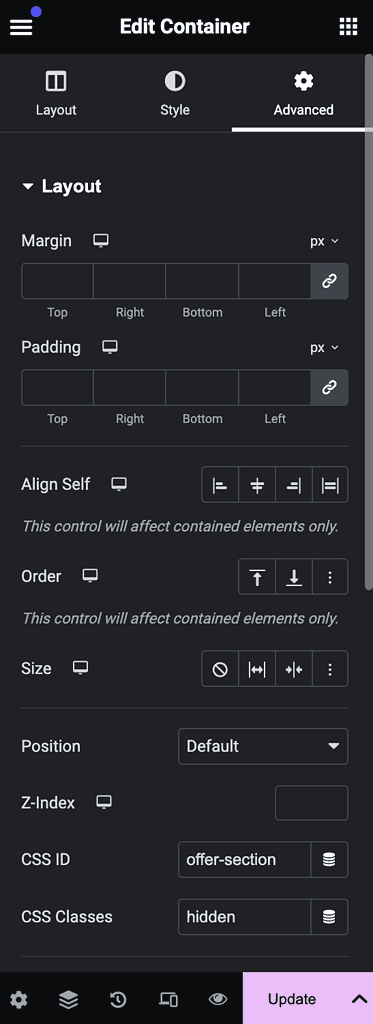
Make Sure CSS ID is offer-section and CSS Classes is hidden
(as shown in above image)
Save everything and refresh your page. Maybe open in an incognito mode and check, your section/element will now be shown to the user after the time set has been passed.
Summary
By using the Code Snippets plugin for the JavaScript and Elementor’s built-in CSS capabilities (or your theme’s customizer), you can achieve the desired timed reveal effect on your landing page. This method keeps your custom code organized and avoids direct theme file modifications.